Adding Accents to Braids
I love a braid with a little funky detail! Elastics are the perfect way to achieve this! You can really do any parting and any elastics placement! First, you’ll want to decide where you want the accent on the head and where your part will be.
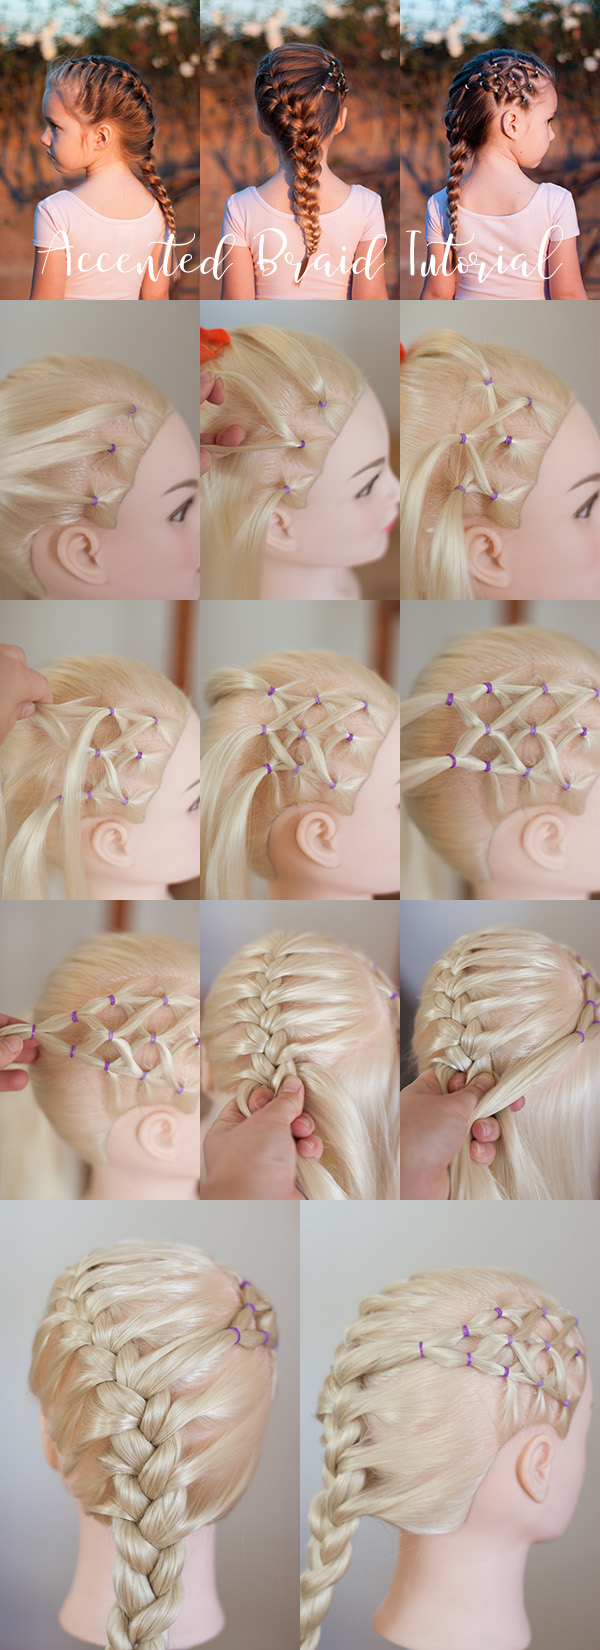
- Part the hair to one side. Your accent should be on the side with the least amount of hair.
- Section off from the part all the way to behind the ear. This will be your accent braid section.
- Your subsections will each be about 1″ square. Start out by making a row of three square sections. Secure each one with an elastic.
- Make another sub section about 1″ wide. The more uniform your sections, the tidier your accent braid will look. Divide this section into three 1″ squares.
- Split each front section in half. The inside section of both outer pieces will be going to the next row in the middle. The remaining pieces will go to the section directly behind them.
- Continue this pattern for one more row.
- For the next row, you’ll want to decrease the amount of strands you have. So split the middle in half and join each piece into the entire section next to it.
- For the next row, you should end up with one section by tying the two remaining ones together. You have finished your accent sectioning!
- On the remaining hair, make a French braid starting at the front of the head.
- When you reach the back, add the accent section ponytail into the French braid.
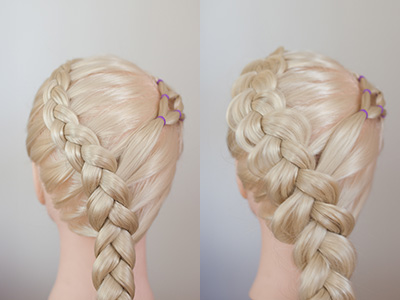
- Braid to the ends and secure with an elastic
If you look closely at the photo of the accent part of the braid I did on my daughter, you will see lots of mess-ups on this part of the style! It doesn’t have to be perfect by any means! Just play around with it and do what you think looks the best! I think if you do colored elastics like I did, the mess ups will be more forgiving. If you were to do clear elastics, or ones that matched the hair, where you put the sections will show up a lot more and you’ll need to be more careful to follow the pattern as well as possible. So keep that in mind when choosing what color elastics to use!
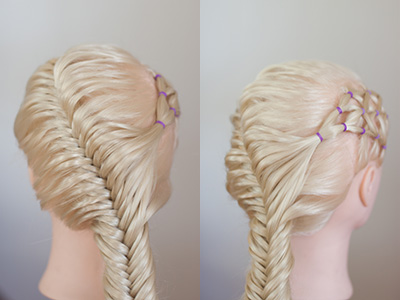
One of my favorite parts about braiding is that by just adding a small change to the style, it will look like a whole new style. So if instead of French braiding the hair, you want to dutch braid it, try that! If you like fishtail braids better, try it! Below are some examples of how switching up the type of braid you do on the same style will make it look a lot different!
This is how the braid looks when you do the braid Dutch (left) or Dutch pancaked braid (right). The plain Dutch braid would look amazing for sports and the pancaked version would look great for a special occasion!

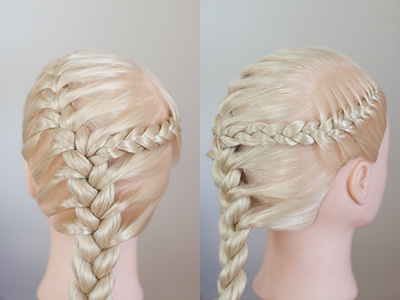
This is the fishtail version! Fishtail braids tend to look a lot more elegant an a regular French or Dutch braid! Notice in the photo on the right, instead of adding all of the hair in from the accented part at once, I added it in a little at a time!
If you don’t want to add elastics, simply use the same parting, but braid the side instead of adding them!
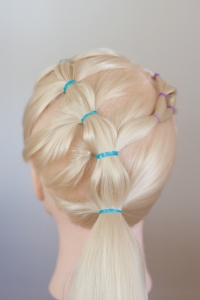
If you don’t know how to braid at all and you want to stick with all elastics, make the elastics accent, then finish the rest of the look with a bubble ponytail!
I love how this style looks classic and simple on one side, but edgy and fun on the other!
I hope that when you read our blog, it inspires you to try new things! The way I work is to get inspiration from different braids that I’ve seen, but always add my own twist to it! There are so many things you can do to each braid you create! There are endless ways to tweak it, such as changing the braid to a Dutch rather than a French, or making the accent part of the braid into a different typle of braid instead of elastics! You can take the same style and make it your own so easily!
We love it when people share with us what they create, inspired by us! Please feel free to send photos of the styles you created to us, or just simply tag us on social media #abellasbraids!
Thank you for stopping by! Please subscribe for many more braiding tips and DIY’s to come!

